How to Reduce Carbide Insert Cost per Part in CNC Machining
Carbide insert price is only one part of the tooling equation. For OEMs, distributors and job shops, the more useful metric is cost per part: the total insert spend divided by the number of acceptable components produced. A lower-priced insert can become expensive if it wears unpredictably, forces frequent adjustments or creates scrap. A higher-value insert can be the better choice when it gives stable cutting, predictable tool life and more usable edges.
1. Calculate cost per part instead of comparing box prices
Start with a simple calculation:
Tooling cost per part = insert cost used during the run ÷ accepted parts produced.
Include all usable cutting edges, but count only edges that can actually meet the required surface finish, dimensional tolerance and tool-life target. Also record the cost of trial pieces, setup adjustments, insert changes, downtime and scrap. This makes it easier to compare two inserts under the same production conditions.
For a stable comparison, record the workpiece material, hardness, operation, holder, coolant condition, cutting speed, feed, depth of cut and the number of good parts per edge. A short production trial is more useful than a catalog price comparison.
2. Use every suitable cutting edge
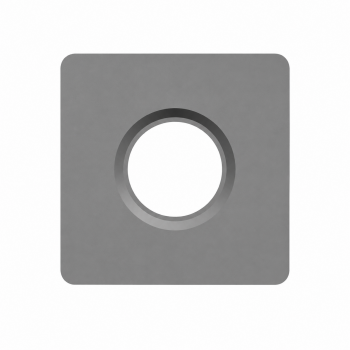
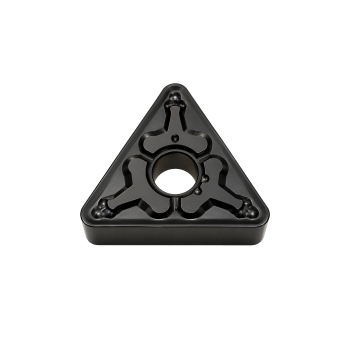
Edge utilization is one of the fastest ways to lower tooling cost. A negative turning insert may offer several usable edges, but the actual value depends on whether each edge can be indexed without damaging the seat, losing repeatability or creating a different cutting condition. In milling, edge count and the insert's ability to maintain a consistent cutting position are equally important.
Before selecting a higher-edge-count insert, confirm three points:
The holder or cutter body supports the insert securely.
Indexing an unused edge does not require excessive cleaning or setup time.
Each edge delivers an acceptable wear pattern and surface finish.
Practical edge utilization is more important than the theoretical number printed in a catalog.
3. Match the grade and geometry to the operation
Choosing the hardest or most expensive grade for every job is rarely economical. Start with the material group and the cutting condition. Steel, stainless steel, cast iron, non-ferrous alloys and heat-resistant alloys create different demands on the cutting edge. Then select a geometry that matches the operation: roughing, medium machining, finishing, profiling, grooving or threading.
Geometry controls chip formation, cutting force and edge strength. A sharp geometry may reduce cutting force in a light cut, while a stronger edge may be more reliable in an interrupted or unstable cut. The best choice is the one that reaches the required tool life without adding unnecessary cutting force or heat.
JetCutt's Selection & Cutting Data resource can be used as a starting point. For turning work, also review the Chipbreaker Guide and the article How to Select a Chipbreaker for Turning Inserts.
4. Establish a stable cutting baseline
A tooling trial should begin with a controlled baseline rather than the most aggressive parameter available. Set a repeatable cutting speed, feed and depth of cut, then change one variable at a time. If cutting data changes together with coolant, workholding or insert grade, the result will be difficult to interpret.
Watch for the difference between normal wear and unstable failure. Gradual flank wear is usually easier to manage than sudden chipping, built-up edge or notch wear. When the failure mode is clear, the next adjustment becomes more targeted: reduce cutting speed for excessive heat, review feed and edge strength for chipping, and improve chip control when chips recut or interfere with the tool.
5. Set the right change-point
Replacing an insert too early wastes usable edge life. Replacing it too late can create scrap, damage the workpiece or overload the machine. Define a change-point using a measurable signal such as surface-finish loss, dimensional drift, a maximum flank-wear limit, rising spindle load or a fixed number of acceptable parts.
For repeat production, record the result by machine, material batch and insert lot. A simple tool-life log often reveals that the most expensive problem is not insert price but variation between batches, operators or setups.
6. Reduce hidden supply and setup costs
Standardizing a small group of insert families can reduce inventory and shorten purchasing cycles. However, standardization should follow application evidence. Keep a common range for frequently repeated work, and reserve specialized geometries for jobs where the improvement is measurable.
Ask suppliers about inspection consistency, packaging, marking, sample support and repeat-supply capability. A reliable supply plan prevents emergency substitutions that change tool life or force a new setup. JetCutt supports turning, milling, parting and grooving, and threading insert programs for distributors, tooling companies and OEM-oriented applications; selection should still be confirmed against the actual workpiece and machine condition.
7. Include sustainability in the calculation
Longer usable edge life normally reduces insert consumption, packaging, transport and production interruptions. Recent research also shows that grinding, edge preparation and coating can contribute materially to the embodied energy of a coated tungsten-carbide insert. That makes tool life and edge utilization useful sustainability indicators as well as cost indicators.
Where technically appropriate, collect worn inserts for the supplier's recycling or recovery program. The first priority remains stable, safe machining; sustainability benefits are strongest when they come from fewer failed inserts and fewer rejected parts.
A practical checklist for your next trial
Define the accepted-part and surface-finish requirements.
Record material, hardness, machine, holder, coolant and workholding.
Choose a grade and geometry for the actual operation.
Set a conservative, repeatable cutting baseline.
Measure parts per edge, wear mode, change time and scrap.
Compare total cost per accepted part, not insert price alone.
Confirm repeat supply and document the approved setup.
Frequently asked questions
Is the cheapest carbide insert always the lowest-cost option?
No. Cost per part includes usable edge life, change time, downtime, scrap and consistency. A lower-priced insert can cost more if it produces fewer acceptable parts.
How many parts should be included in an insert comparison?
Use enough parts to capture a complete wear trend and at least one repeatable indexing or replacement event. For production decisions, repeat the trial on more than one edge and, when possible, more than one insert lot.
What information should I send when requesting a JetCutt recommendation?
Send the current insert or toolholder model, workpiece material and hardness, operation, cutting data, coolant condition, stability issues, required finish and target quantity. These details allow the selection to focus on the complete machining system.
Where can I review related insert-selection guidance?
Start with JetCutt's Technical Overview and carbide grade selection guide.
Technical references
ISCAR: Getting More from Every Gram — edge utilization, carbide inventory and reconditioning considerations.
International Journal of Advanced Manufacturing Technology: Embodied Energy of Coated Tungsten Carbide Inserts — energy contributions from post-sintering processes.
Sandvik Coromant: CoroTurn PI — examples of process security, coolant delivery and multi-edge utilization.
Need help comparing inserts for a production application? Contact JetCutt with your current insert, workpiece material, operation and target improvement for a practical starting direction.